Author’s Note
This blog has been a bit delayed, but I know that it is worth it. Relaxation is a major part of being an actor, and I got caught up in the research of actor relaxation. Please enjoy this one!
“When there is tension, one cannot think or feel.” – Lee Strasberg1
A Bit of History and Why Its Important
“Among the nervous people of our generation this muscular tensity is inescapable. To destroy it completely is impossible, but we must struggle with it incessantly. Our method consists of developing a sort of control; an observer, as it were. This observer must, under all circumstances, see that at no point shall there be an extra amount of contraction. This process of self-observation and removal of unnecessary tenseness should be developed to the point where it becomes a subconscious, mechanical habit. Nor is that sufficient. It must be a normal habit and a natural necessity, not only during the quieter parts of your role, but especially at times of the greatest nervous and physical lift.”2
Relaxation is the foundation on which almost all actor’s work is based.3 Relaxation is needed in short, to help identify where there is tension in the instrument and helps to get rid of it. An instrument with tension is not as open to creativity and expression, or as Stanislavski put it, ‘Muscular tautness interferes with inner emotional experience. As long as you have physical tenseness you cannot even think about delicate shadings of feeling or the spiritual life of your past. Consequently, before you attempt to create anything it is necessary for you to get your muscles in proper condition, so that they do not impede your action.’4
You can use relaxation exercises to enter what Stanislavski called the “creative mood.”5
Stanislavski was the first to try to define those moments when the actors act well, to establish a technique to stimulate a creative mood, to relax and concentrate.6 Strasberg studied at the American Laboratory Theatre with Stella Adler and Harold Clurman, where they were all taught by Richard Boleslawski (Who studied directly under Stanislavsky at the Moscow Arts Theatre). These three actors were the founding members of the Group Theatre, which was the first American acting ensemble to utilize Stanislavski’s techniques.
It is very important to know that this exercise is not designed to produce an emotional response, though that may happen as physical tension can have emotional roots. “The muscles around the mouth, jaw, and the tongue are the most conditioned through the habits of speech and expression. The muscles and nerves contained in the back hold traumatic experiences from childhood and can be very tense and are more difficult to make contact with.”7 By systematic and deliberate exploration of these muscles, the actor will identify the tension in each of them, and release that tension through an act of will.8 Don’t go searching for anything other than tension in your instrument.
If the goal is relaxation why can I not do yoga or meditation
This seems to be a very common question, so I’ll throw my two cents in here. These can and do produce relaxation, but not in an actor sense. They do not show you where there is tension in your instrument. This is a very crucial part of the process. As my acting teacher says, imagine if you take your car to the mechanic because it is not running properly and without even seeing the car the mechanic just says “I’m just going to fix the the windscreen wipers.” You would probably go somewhere else. You want the mechanic to examine your car to find out what’s not working right so he can fix and fine tune your car. This is what this relaxation exercise is about, it is about identifying and releasing both mental and physical tension inside of your instrument. Also, if the actor did learn to identify this kind of tension, the actor obviously cannot stop in the middle of a scene to meditate, or start doing yoga. Strasberg’s relaxation exercise, when mastered, helps the actor identify the tension as it becomes apparent, then release the tension in a manner invisible to the audience.9
With yoga, along with the issue mentioned above, also focuses on form. Every move has a form, a way it is supposed to look like, a hand not pointed the right way, a leg not bent the correct amount, and the exercise will suffer for it. Strasberg’s relaxation does not focus on form, in fact it makes the actor do large movements that are very much outside of what people do day to day. This is important because if the actor is focused on how something should look rather than how something feels there is a issue. When we focus on form we are wholly thinking about how we think things should be, if you act like that you are merely imitating, pretending, and audiences can see that! The goal of Strasberg’s exercise is freedom, physically and mentally.
The Chair
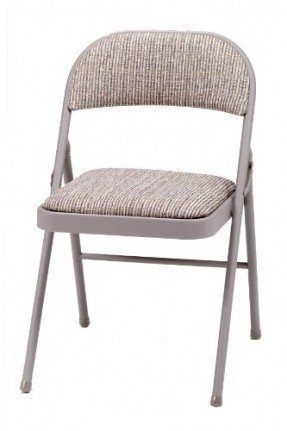
This may sound trivial, but you need the right kind of chair to do this. I have tried this exercise in a lot of different chairs. If the chair is not fit for purpose, the exercise does not have the same impact. Here are some key things I look for.
- It cannot have arm rests, they will interfere with the movement.
- It must be sturdy, to be it has to be made out of metal. I’m a big guy so plastic backed ones seem to be, wooden ones from Ikea don’t hold together well at the joints for the writhing of the hips.
- It cannot be awful to sit in. If you cannot sit in it for 45 minutes to an hour, it’s not going to work. I prefer a bit of padding.
- It can’t slide on the floor very easily, so I do like my chair to have rubber feet. If you’re going to do this on carpet this is less of an issue, but I tend to do this on wooden floors so it’s necessary to me.
- The height of the back of the chair cannot be too high or this will interfere with movement.
Here is a photo of the type of chair I prefer.
The Exercise Itself
“The Actor’s body can be of optimum value to him only when motivated by an unceasing flow of artistic impulses,; only then can it be more refined, flexible, expressive and, most vital of all, sensitive and responsive to the subtleties which constitute the creative artist’s inner life.” – Michael Chekhov10
A few quick notes:
- Almost every time I do this exercise, my eyes begin to water, not full on cry, but there is definitely something being released. You may or may not have any kind of reaction to this exercise, that’s ok, just don’t go chasing an emotional response.
- You also may feel hot or cold without any explanation during this exercise. Its ok.
- Yes, this is strange, and people will think you’re weird. Its ok, you’re an actor, get used to it.
- If there is pain or you have a condition that prevents you from doing any of the movements, skip that portion. Never work into pain.
- The exercise will always move from head to toe.
- This exercise is done without music.
- I was taught this by Brian Timoney, who describes this method of relaxation with a bit more finesse in his book The Ultimate Guide to Method Acting. So if you want to know more about this, check out his book and website at: https://www.briantimoneyacting.co.uk/
- You can also see how Lola Choen describes this exercise in her book The Method Acting Exercises Handbook.
First, sit in the chair, with your arms hanging loosely by your sides, you head hanging loose, and your legs in front of you, but not parallel to the floor. The chair should be taking all of your weight.
- Next, we are going to turn to our breathing, taking nice deep breaths.
- Next, ask yourself, “Where am I right now?” No, not where you are physically in a room, where are physically in terms of your instrument. Does anything feel off, do you feel any tension right off the bat, any pain? And also ask yourself, “Where am I now mentally?” Is there something that is pressing that you cannot stop thinking about? Are you stressed over an event, a conversation, a to-do list? Acknowledge all of these things, don’t try to block them out, let them flow as they want, the goal is not to contain them or push them off to the side, let them live. If you start to have an emotional response, that’s fine, if you don’t that’s also fine.
- Now you begin to let out a private “Ahh” sound. Just like when you open your mouth for the dentist, and just keep it going. This sound starts off “private” meaning low in volume and intensity because this is a warm up and your vocal chords need to warm up as well. As you progress through the exercise you can increase the volume as you feel comfortable, just don’t strain. You will keep this sound going through the entire exercise.
- You break up this “ahh” sound with short, explosive “ha” sounds whenever you have the urge to. When you do these sounds, you should really feel it in you diaphragm, not your throat. By tensing your diaphragm and quickly expunging the air you are releasing tension. It may sound strange, but I usually do feel a lot of tension leave when I start doing this. This explosive “ha” sound should only be done once you feel you have warmed up your vocal chords, and if you feel any strain in your throat, you should just continue with the “ahh” sound. Usually I wait until I have completed the first round of basic relaxation head to toe before I interject these, but again this is totally up to you.
- While still making the “ahh” sound begin to roll your head, clockwise. Taking note of any resistance or tension. After several times clockwise, stop and go counter clockwise also noticing any resistance or tension.
- After stopping with the head roll, take your hands and with your pointer and index finger gently rub the temples of your head.
- Next, using your pointed finger on one hand, gently rub the area just above the bridge of your nose, right between your eyebrows. (This helps a lot when working with really bright lights, your eyes will tense up while squinting, this will help ease that)
- Now release your arms so they sit loosely at your side. Remembering to take nice deep breaths and still making the “ahh” sound.
- Moving to the arms and shoulders. You’re going to be rolling your shoulders and your arms, while your arms are outstretched. Begin to roll them backwards in a very large exaggerated circle. With this movement, I have found that I get the most out of it when I try to make my shoulder blades touch when my arms and shoulders are moving backward, and then trying to reach my hands out as far as possible when moving forward. I really feel in my upper back. This is a very unnatural movement, and that’s the point.
- Now drop your arms to your sides. You can test to see where there is tension by lifting up one arm at a time and letting it drop. There should not be any resistance as it falls. I always keep my wrist limp when doing this in order to remove any unwanted tension. This particular point I got from An Actor Prepares, “He insisted that when we use an “isolated” group of muscles, be they shoulder, arm, leg, back muscles, all other parts of the body must remain free and without any tension. For example: in raising one’s arm by the aid of the shoulder muscles and contracting such as are necessary to the movement, one must let the rest of the arm, the elbow, the wrist, the fingers, all these joints, hang completely limp.”11
- Now with your arms by your side we will now shift our attention to your hips. (Now this is by far the strangest feeling and oddest position of this whole process to me. So if it feels weird, you’re in good company.) Let your legs slide forward until your butt slides to the edge of the chair. Your head should be roughly looking toward the ceiling and your arms should be hanging loosely at your sides . Now using your heels as your pivot points move your hips clockwise for a few rotations, then stop and go counterclockwise. During this part I always find making the “ahh” noise the most difficult, I assume because I am engaging my core muscles while rotating my hips.
- Now sit back into your chair in your original position.
- Next part of the body we will work on is the legs. Keeping your knee bent (keeping your calf and foot loose) pick up your right leg and make very large exaggerated circles both clockwise and counterclockwise. Once you have done both directions, straighten your leg and do circles in both directions with your feet. After you have done both directions, let you foot drop to the ground, don’t gently put it down, just relax your leg and let it fall.
- Now do the same procedure with your left leg.
- You have no completed one round of the relaxation exercise. Try to do this for 30 minute before you begin your exercises to get you into the creative state. You will notice a difference, I promise.
Final Notes
This blog does take up more time than I had anticipated, but it is a lot of fun and really interesting to me. So this will continue, but the schedule may fluctuate.
Links to Topics Discussed in this Blog


Notes
- Robert H. Hethmon, ed., Strasberg At The Actors Studio: Tape-Recorded Sessions (New York, Theatre Communications Group, Inc., 2010), 88.
- Constanin Stanislavski, An Actor Prepares, trans. Elizabeth Reynold Hapgood (New York, Bloomsbury Academic, 2013), 86.
- Hethmon, ed., Strasberg At The Actors Studio: Tape-Recorded Sessions, 89.
- Stanislavski, An Actor Prepares, 84-85.
- Lola Choen, The Method Acting Exercises Handbook, ed. Matthew D. Rudikoff (New York, Routledge, 2017), 17.
- Joan Barthel, “The Master of the Method Plays a Role Himself.” New York Times (New York), Feb 2, 1975, p X1. [Available online:
https://www.nytimes.com/1975/02/02/archives/the-master-of-the-method-plays-a-role-himself-strasberg-brings-his.html ] [Accessed: April 15 2019] - Choen, The Method Acting Exercises Handbook, 21.
- “Relaxation for Actors.” Theatr Group. [Available online:
http://www.theatrgroup.com/Method/actor_relaxation.html ] [Accessed April 15, 2019] - Ibid.
- Michael Checkov, To The Actor: On The Technique of Acting, (Mansfield, Connecticut, USA; Martino Publishing, 2014), 4.
- Stanislavski, An Actor Prepares, 93.